Brisket, often crowned as the king of BBQ, can intimidate both new and advanced backyard BBQ’ers alike. But, have no fear! With thanks to #TeamLFR Pitmaster Taylor Carrol, Live Fire Republic’s Field Guide to Legendary Slowly-Smoked Brisket is going to remove all the guesswork, equip you with the know-how, walk you through a fool-proof step-by-step process, and totally elevate your pitmaster game to the final boss level.
Now, read onward, fire up the smoker, crack open an ice cold beverage (or two), and let’s throw down a Texas-sized feast of mouthwatering, smoked beef brisket!
Step 1- CHOOSING THE RIGHT CUT FOR SLOWLY-SMOKED BRISKET
First things first, when choosing a brisket go with the nicest cut you can afford. If budget is not a factor in your decision, undoubtedly, a well-marbled wagyu roast is going to be significantly more flavorful and exponentially more forgiving than a comparable Select, Choice, or event Prime-grade cut. Factors impacting flavor and “forgiveness,” could include the animal’s quality of life, diet, and process and precision of butchery, packaging, preservation and dry vs. wet-aging.
Simply speaking, Select, Choice, and Prime grades of brisket differ in terms of quality, marbling and price. Select has the least marbling and tends to be leaner, making it a budget-friendly option. Choice has more marbling, resulting in better flavor and tenderness. Prime is the highest grade with abundant marbling, offering the most flavorful and juicy brisket, but it’s also the most expensive.
- Choice Grade: The average price can range from $3.99 to $6.99 per pound
- Select Grade: The average price can range from $2.99 to $4.99 per pound
- Prime Grade: The average price can range from $8.99 to $14.99 per pound
- Wagyu: The average price can range from $20 to $50.00 per pound OR even higher, depending on the specific type, availability and grade of the meat.
Please note that these prices are approximate and can vary significantly. It’s always recommended to check with local markets, butchers, or online sources for the most accurate and up-to-date pricing information
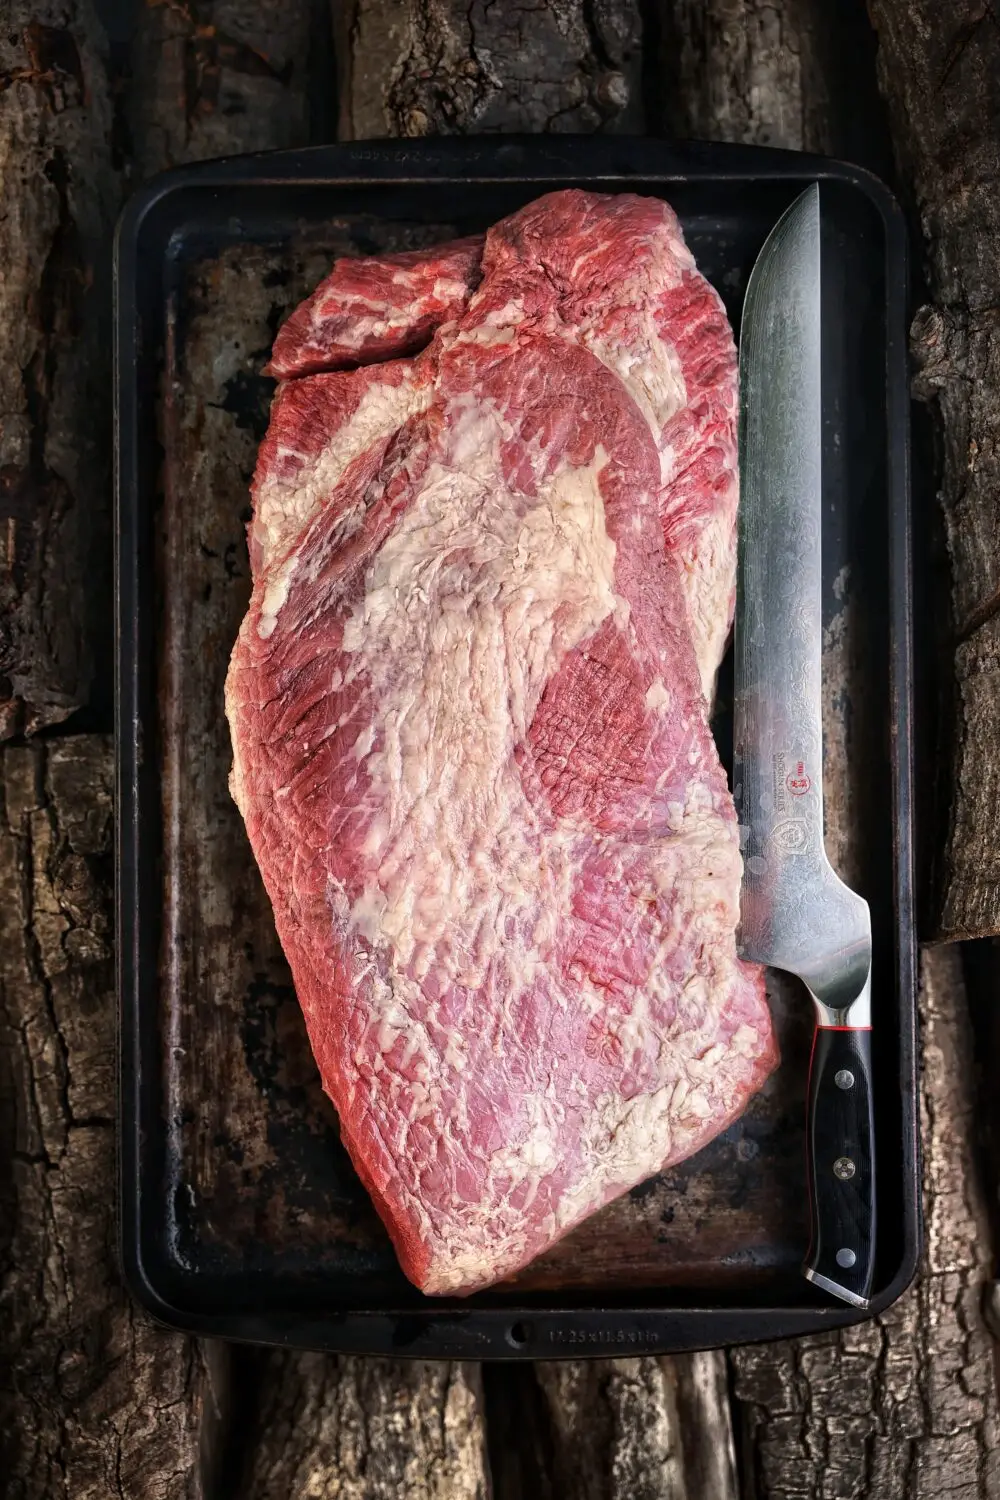
While in front of the meat cooler, look at the meaty sections of the briskets and make your selection based off the following:
- Fat- choose the one that has the most marbling throughout the meat. This intramuscular fat will lead to a juicy brisket with a gorgeous silky texture. I also always make sure there is at least ¼ in fat cap, some butchers pre-trim and can get overzealous with cutting off the fat.
- Cut- a whole packer brisket if my preferred purchase. This cut is the point and flat intact. A whole packer will give you and your guests the option of a lean or “fatty” piece. It is also a lot easier to achieve great results with a packer opposed to a flat.
- Size and thickness- I prefer a 12 to 15 lb brisket so I can smoke it overnight without having to worry about waking to it being overdone. Look at the flats and choose one that has a thicker section, at least 3 inches or more. This will help prevent a dry flat from it cooking faster than the point- a chronic flaw we see often.
Step 2- SETTING UP YOUR GRILL FOR SLOWLY-SMOKED BRISKET
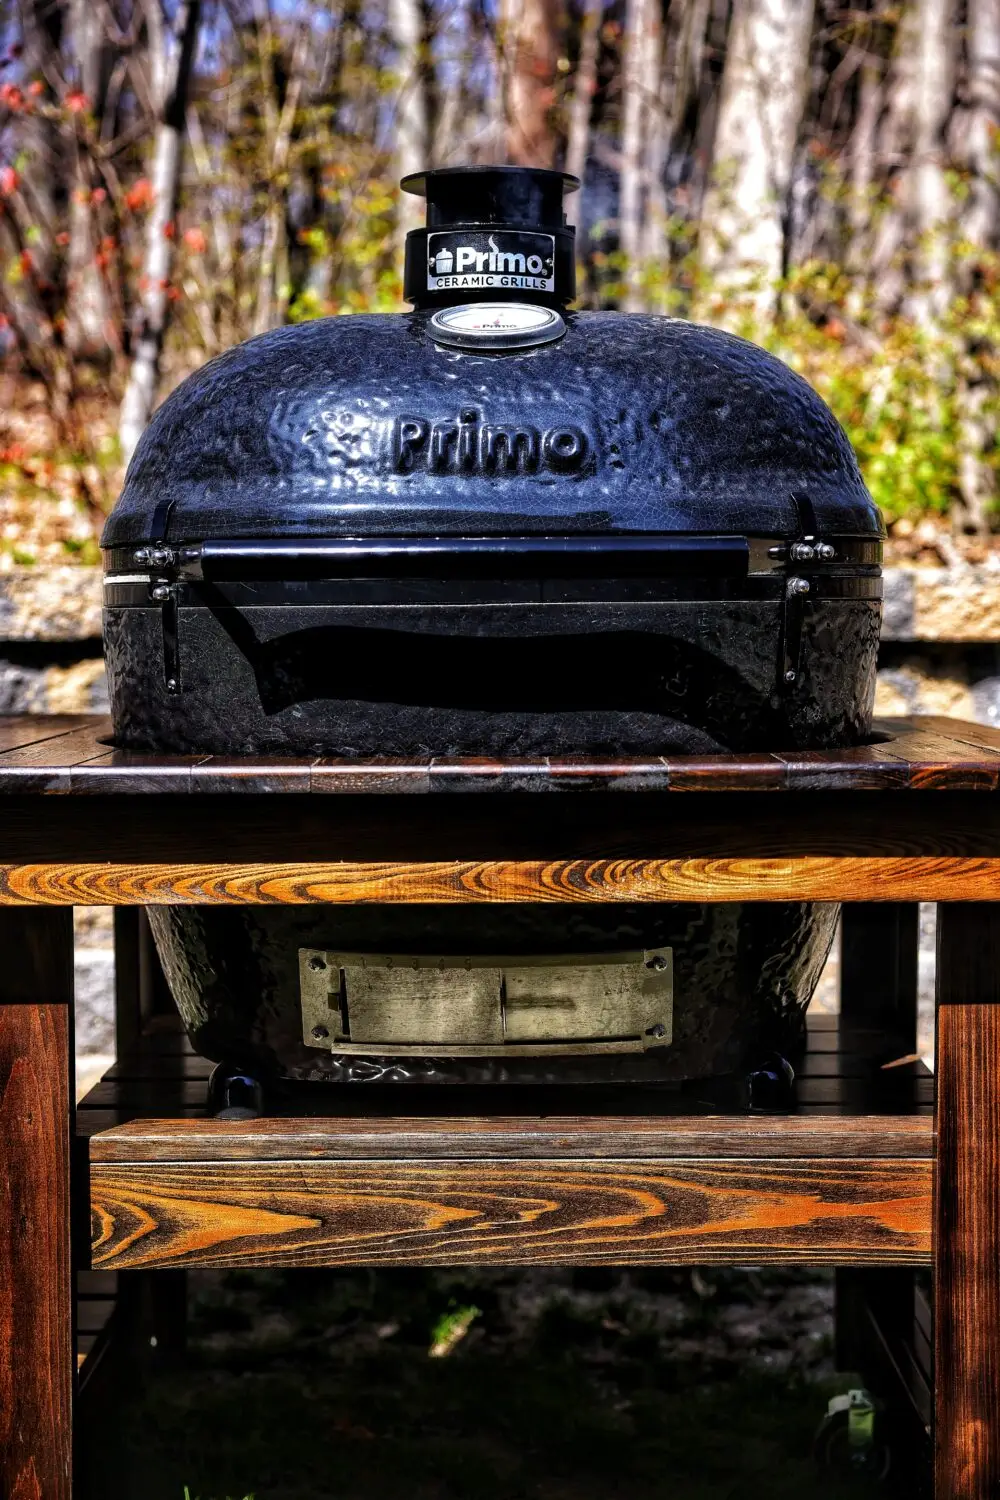
Most folks utilize a Kamado-style smoker when it comes to smoking brisket, here’s an easy step-by-step set-up:
Kamado smokers, like the Primo Ceramic Grill (See Image Below), are designed to always fill the firebox, but this does not mean that all the coals will be burning and ashed over. Think of the fire as something that is fed by the top and bottom air vents, when you open them wider, the coal bed expands to create more heat. When you damper them down, the coal bed shrinks down. This means only what you need is ignited opposed to the entire firebox. When you are done with your cook and close the vents completely, the fire is extinguished, and the remaining coals can be stirred before the next cook to filter out any residual ash and then they are ready to be used again.
When loading the coals, I make a wood chunk sandwich. Start by lay down a layer of lump charcoal, followed by 6-10 wood chunks, then fill it up with more lump until it reaches the top of the firebox. The wood does not need to be soaked, that just makes it take longer until you reach “clear blue smoke”.
Now it is time to light it up- be sure to never use lighter fluid in a ceramic grill, since it is porous, it will absorb the chemicals and leave that flavor behind forever. The preferred method here is to use a fire starter or a MAP torch to light the very center of the coals. Leave the grill open for about 5 minutes, or until you have a baseball size spot of glowing embers, then close the lid of the grill. Once closed, leave the top vent open 100% and set the bottom vent so it is closed halfway.
For a brisket cook we are are going to run it between 225-275 F depending on our patience level, so you do not want to overshoot temperature. Think of that bottom vent as the big guns, it is the direct breath to your fire and the go to when you want a 20 degree plus increase or decrease in temperature. The top vent is our fine tuner, the go to for 5-10 degree changes. Once you are 75 degrees from your desired temperature, go ahead and get your settings down and drop in your plate setter since we will be using indirect cooking here. Once your temperature is stable, wait until there is only clear blue smoke. If you put food on while it resembles a smokestack, you are going to have an unpleasant acrid taste.
STEP 3- THERE’S MORE TO THE RUB THAN SALT AND PEPPER, OF COURSE
First and foremost, I know more pitmasters than I can count. One hundred percent of them will tell you they only use salt and pepper to season their brisket. Here’s what I can assure you, that’s not true.
Now, there is more than one way to season a brisket and I’d encourage you to experiment. Marrying one rub or seasoning blend is boring and there are no bonus points for monotony and the mundane when it comes to brisket! That said, here are a few spins on classic beef rubs that we’d strongly recommend:
- Dalmatian Rub – this is the most common rub you’ll find in Texas, comprised of equal parts kosher salt and coarsely ground black pepper. That said, even a purist, will accept you adding a tablespoon or two of roasted granulated garlic to the mix. And, I’d strongly encourage you to do so!
- Ground Coffee and Ancho – plenty of very finely ground coffee, ancho chili powder, brown sugar, garlic, onion, paprika, kosher salt and black pepper!
- Cowboy Rub – most commonly contains coffee, paprika, salt, garlic granules, black pepper, and onion powder. Some add brown sugar to this mix, but I dislike this addition as it burns easily during a long cook.
- Chile Pepper Rub – My favorite combo is paprika, chipotle, ancho, dried orange peel, oregano, and salt pulverized in a coffee grinder. This has a gorgeous well-rounded flavor and results in a nice colored bark.
- Moroccan-style Rub- toasted cumin, coriander, anise, paprika, cinnamon and nutmeg, ginger, turmeric, smoked paprika, garlic, salt and pepper. So warm, hearty and perfect for larger cuts of beef!
STEP 4- BASTING A SLOWLY-SMOKED BRISKET
This may be the most controversial portion of the brisket process. “Mopping” or misting a brisket during the smoking process involves periodically basting the meat’s surface, after the first two hours of the cook, and before wrapping the roast in butcher paper. The purpose of adding supplemental fluids is to enhance flavor, add moisture, and create a glaze on the exterior of the slowly-smoked brisket. However, there are both benefits and potential consequences to consider:
Benefits of Mopping and Misting:
- Flavor Enhancement: Mopping can allegedly contribute to the overall flavor profile of a slowly-smoked brisket by introducing additional layers of taste. The liquid mixture used for mopping often contains spices, herbs, and other flavorful ingredients that infuse into the meat during the cooking process.
- Moisture Retention: Mopping can help to prevent the brisket from drying out by adding moisture to the surface. The liquid mixture creates a barrier that helps to seal in the natural juices of the meat, resulting in a more succulent and tender final product.
- Bark Formation: The repeated application of the liquid mixture during mopping can promote the formation of a desirable crust, known as the bark, on the surface of the brisket. The bark adds texture and a flavorful outer layer to the meat.
Consequences of Mopping and Misting:
- Temperature Fluctuations: Mopping requires opening the smoker or grill to apply the liquid mixture, which can cause temperature fluctuations and disrupt the cooking process. This can lead to longer cooking times or difficulties maintaining a consistent temperature, which can only lead to one thing – dry, overcooked, and unappetizing slowly-smoked brisket. Also, each time the smoker is opened, you’re sacrificing smoke – and, if the grill is open enough, you may as well just cook your brisket in the oven!
- Bark Disruption: Mopping can disrupt the formation of the bark if not done carefully. Too much liquid or excessive brushing can wash away the flavorful crust that has formed, resulting in a less pronounced bark. BTW, see what we did there?! We put bark formation in the benefits and bark disruption in the consequences. Are we talking out both sides of our mouth? Well, yes and no.
- Personal Preference: Some pitmasters prefer not to mop their briskets, as they believe that the natural flavors of the meat and the smoke should shine through without the need for additional liquid application. It ultimately comes down to personal preference and the desired outcome.
Ultimately, the decision to baste a brisket during the smoking process depends on personal preference. Some pitmasters, such as Aaron Franklin, prefer to mop for the benefits it offers in terms of flavor and moisture retention, while others choose to let the brisket cook undisturbed to achieve a specific bark texture. It’s important to consider the balance between achieving the desired flavor and texture and potential disruptions to the cooking process.
Now, if you want to bates here are some of our GO-TO Brisket Mops:
- “The Classic”- this consists of ketchup, brown sugar, and apple cider vinegar
- “Spicy”- a twist on the classic, this is made up of brown sugar, ketchup, apple cider vinegar, and hot sauce
- “Bourbon”- reduce your favorite bourbon then stir in honey, fruit preserves of your choice (I like apricot or fig), and hot sauce
STEP 5 – WRAP OR NOT TO WRAP SLOWLY-SMOKED BRISKET, THAT IS THE QUESTION
Wrapping BBQ is often referred to as “The Texas Crutch”. Wrapping a smoked brisket helps to retain moisture, and if you really need to speed it up and wrap loosely, it in turn creates steam and helps to cook the brisket faster. The wrapping material also helps to insulate the meat, which prevents heat from escaping and helps to distribute the heat more evenly.
I like add tallow to my brisket and then wrap tightly against the meat to insure it does not steam but adds some of that insulation and moisture retention. Most wrap the brisket when it comes to the temperature most common for the stall, about 175 F, to help speed it up.
STEP 6- WHY COOK BRISKET SLOWLY?
When cooking low and slow, around 225-275 F, you’re allowing plenty of time for both fat rendering and the breakdown of very tough connective tissue. The slower the fats, proteins and connective tissues render, inevitably, the silkier the mouth feel is going to be in the final bite. Here are the point by point benefits:
- Tenderizes Tough Meat: Beef brisket comes from the chest area of the cow, which contains a lot of connective tissue. These tissues are composed of collagen, which is tough and chewy when not properly broken down. Slow cooking methods, such as smoking or braising, allow the collagen to gradually break down into gelatin, resulting in a tender and melt-in-your-mouth texture.
- Flavor Infusion: Slow cooking allows ample time for the flavors of the rub, marinade, or seasoning to penetrate the meat. The low and slow cooking process allows the flavors to develop and meld together, resulting in a more flavorful and delicious end product.
- Moisture Retention: Slow cooking helps to retain the moisture in the meat. By cooking at a low temperature over a longer period, the moisture doesn’t evaporate as quickly, resulting in a juicy and moist brisket. Just don’t forget the rest (next and final critical step!).
- Even Cooking: Slow cooking ensures that the meat cooks evenly throughout. It gives the heat time to penetrate the meat gradually, reducing the risk of overcooking the exterior while the interior remains undercooked.
- Control and Precision: Cooking brisket slowly allows for better control over the cooking process. By using low and consistent temperatures, you have more control over the desired level of doneness and can avoid overcooking or drying out the meat.
Overall, slow cooking is ideal for beef brisket because it helps transform a tough cut of meat into a tender and flavorful delicacy. The combination of collagen breakdown, flavor infusion, moisture retention, even cooking, and better control over the process all contribute to achieving the best possible results.
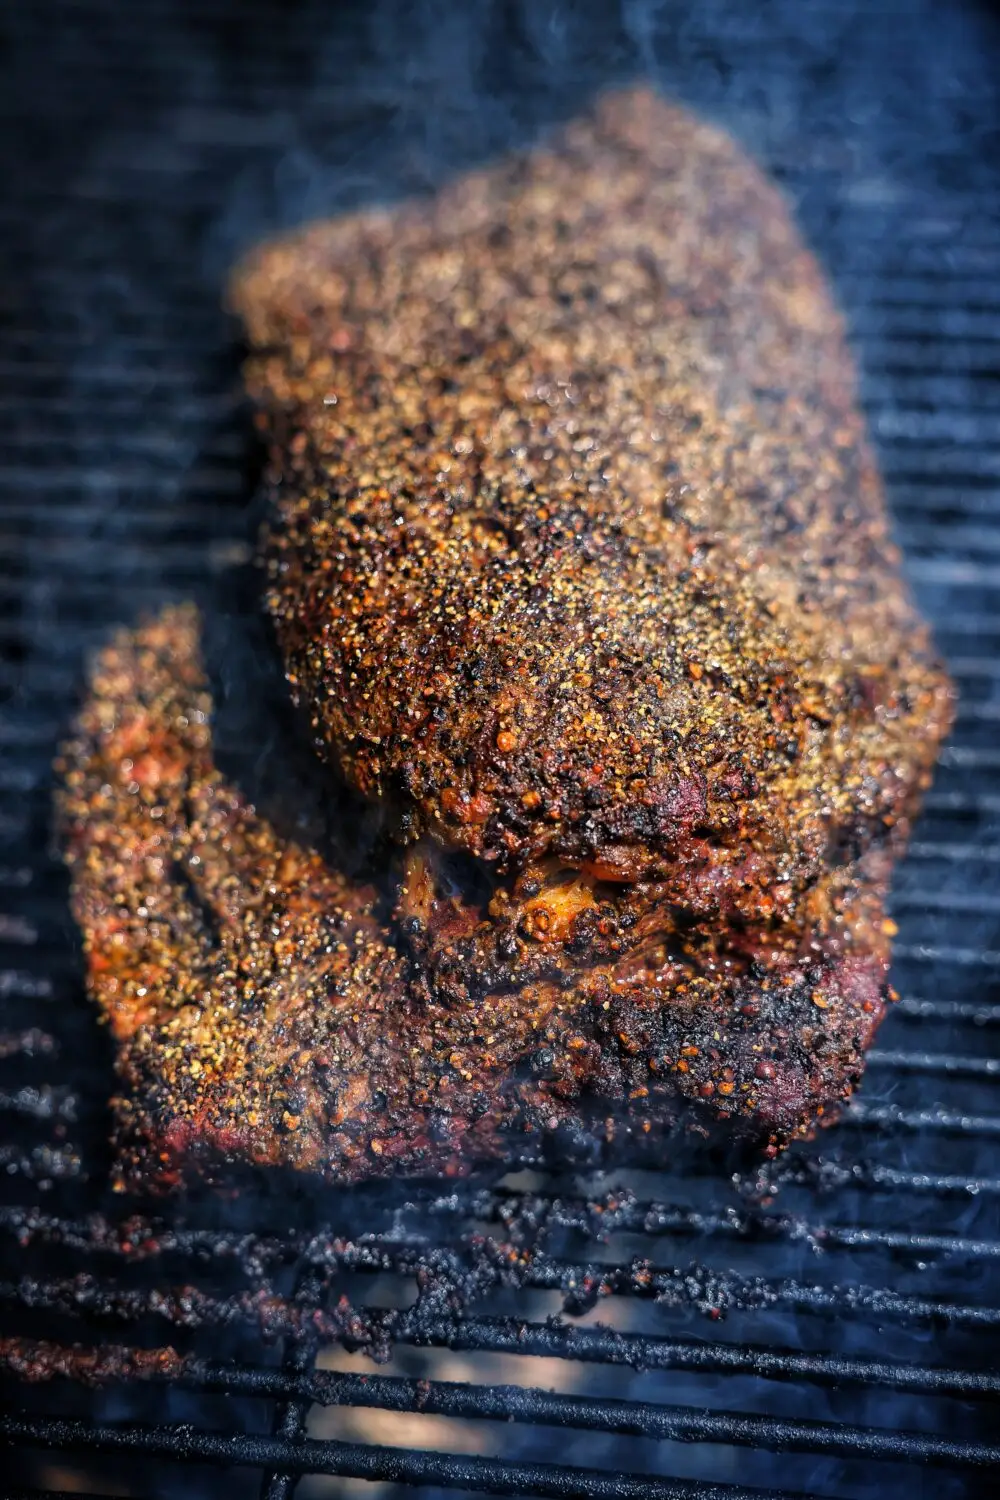
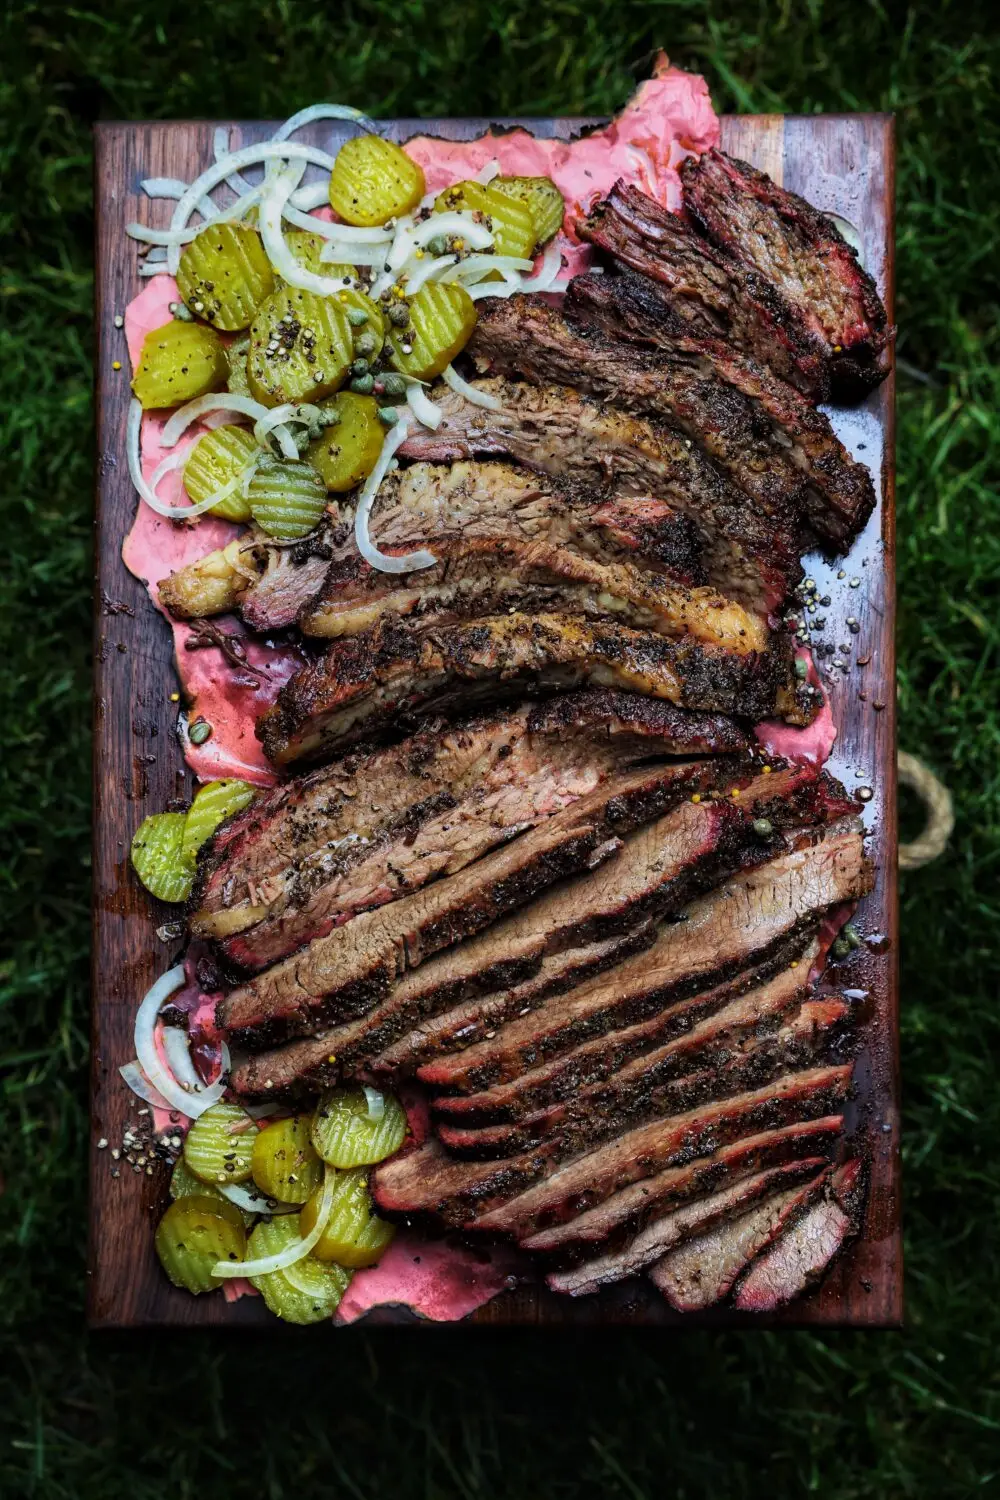
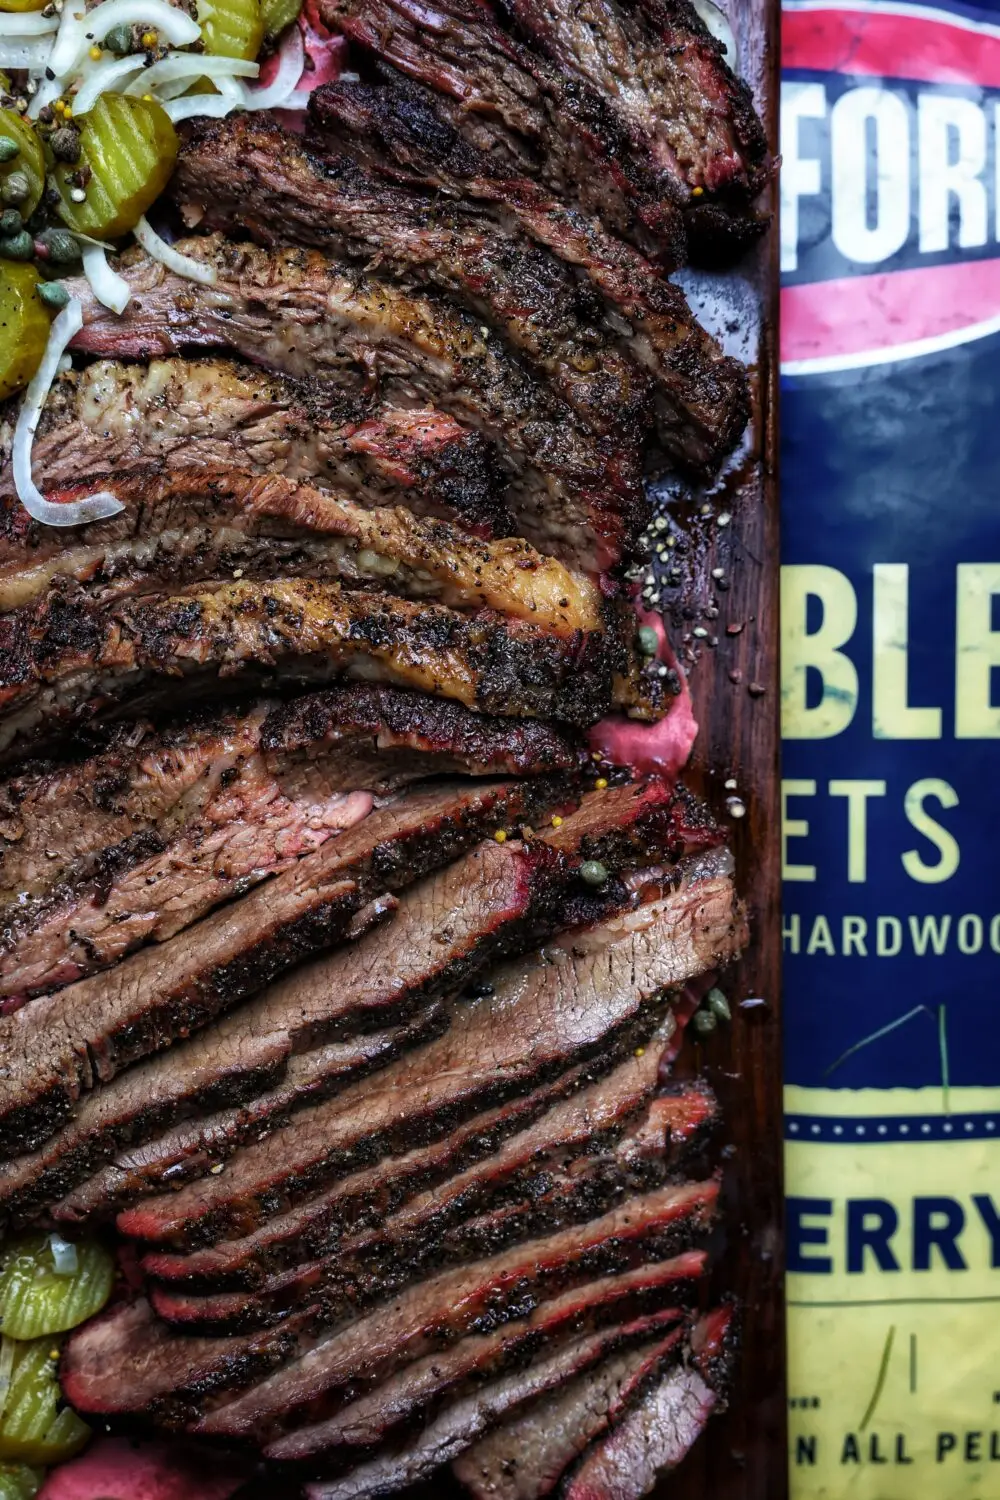
What is a smoke ring?
While most people are fixated on a good smoke ring, it is not indicator of flavor. It is just the result of a chemical reaction between the meat and high quality wood smoke. This reaction occurs when the amino acids and natural sugars in meat are heated and combined with nitrogen oxide gases produced by burning wood and charcoal. The reaction results in the formation of nitric oxide, which reacts with myoglobin in the meat, creating the pink color AKA smoke ring. The key factors in creating a smoke ring are low and slow cooking temperatures, and using a quality hardwood

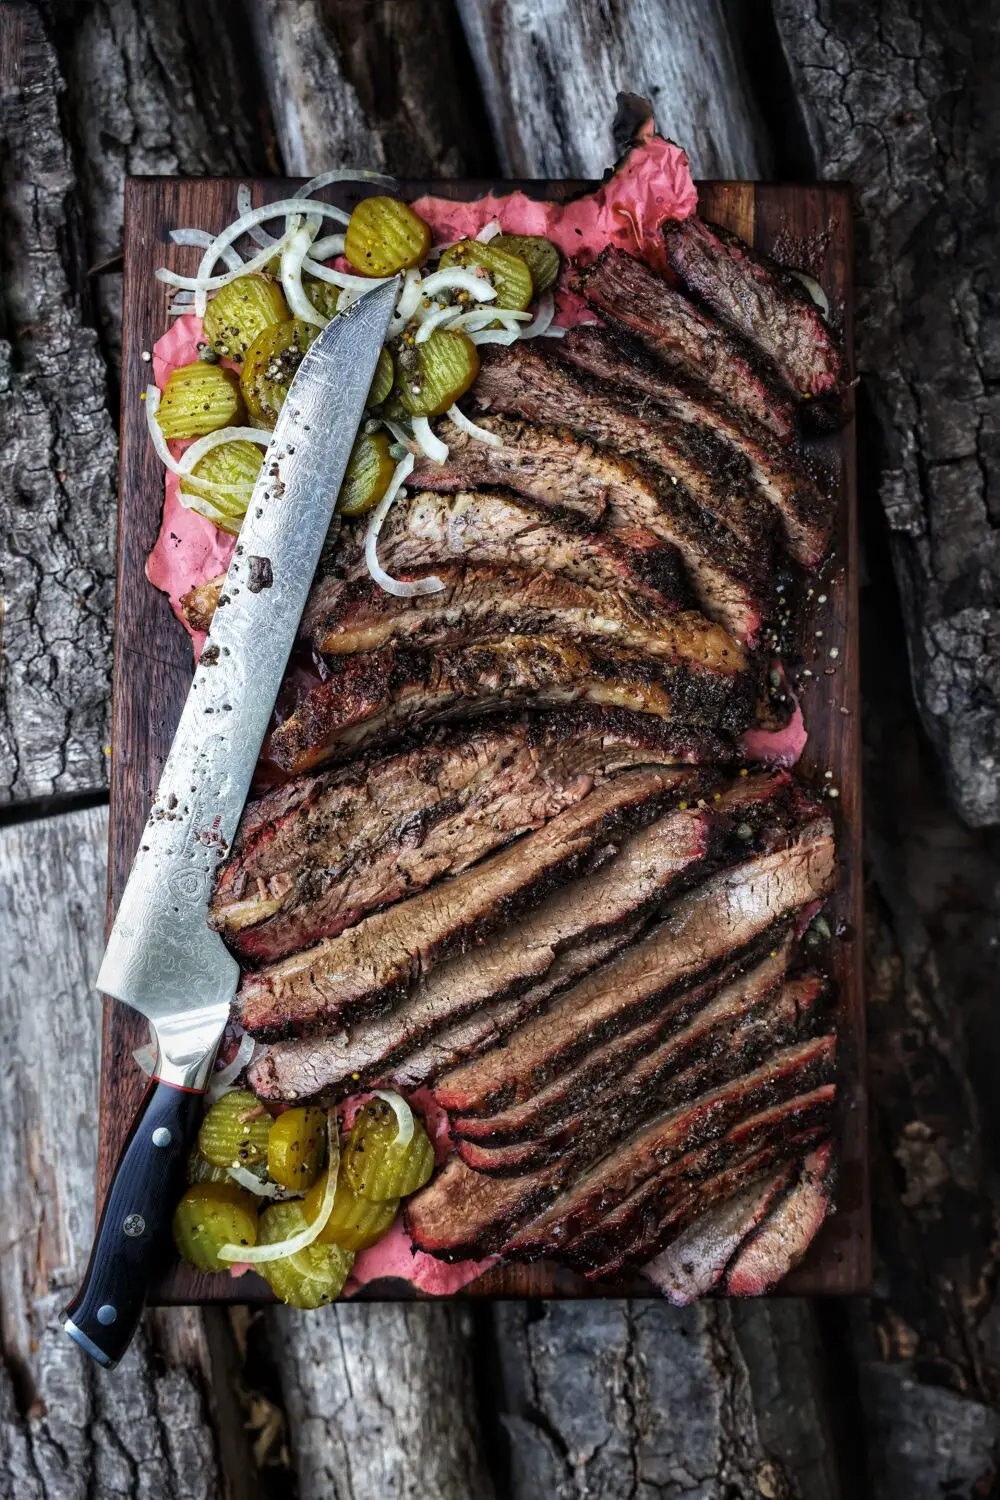
STEP 7 – THE REST
Resting slowly-smoked brisket is important for several reasons:
- Redistribution of Juices: During the smoking process, the heat causes the juices in the brisket to move towards the center. Resting allows the meat to cool down slightly, which helps redistribute those juices throughout the entire cut. This redistribution helps to ensure that each slice of brisket remains juicy and flavorful.
- Tenderization: Resting allows the muscle fibers in the brisket to relax and reabsorb some of the rendered fats and juices. This helps in tenderizing the meat further, making it more enjoyable to eat.
The recommended resting time for slowly-smoked brisket is typically around 1 to 2 hours. This duration allows the brisket to cool down slightly while still retaining its warmth. However, it’s important to note that the resting time can vary depending on the size of the brisket and personal preference. Some pitmasters prefer resting for even longer periods, such as 3 to 4 hours, to achieve optimal tenderness.
During the resting period, it’s important to note that the internal temperature of the brisket may continue to rise slightly, and the carryover heat will further contribute to the tenderness and flavor development. Therefore, it’s crucial to plan your cooking time and rest accordingly to ensure the brisket reaches your desired level of doneness.
SUBSCRIBE TO AND FOLLOW LIVE FIRE REPUBLIC ACROSS SOCIAL, WEB AND OUR ADVENTURE CULINARY SERIES ON YOUTUBE!
Subscribe to LiveFireRepublic.com for an irresistible database of tantalizing live fire and outdoor cooking recipes. Ignite your passion by attending their one-of-a-kind experiential open flame events, where grilling prowess meets unforgettable camaraderie. Fuel your inspiration further with their adventure culinary series on YouTube, igniting your taste buds and expanding your outdoor cooking repertoire. Connect with Live Fire Republic today, and unlock a world of mouthwatering delights that will elevate your grilling game and create memories that will last a lifetime!